Amber from Camera to Print
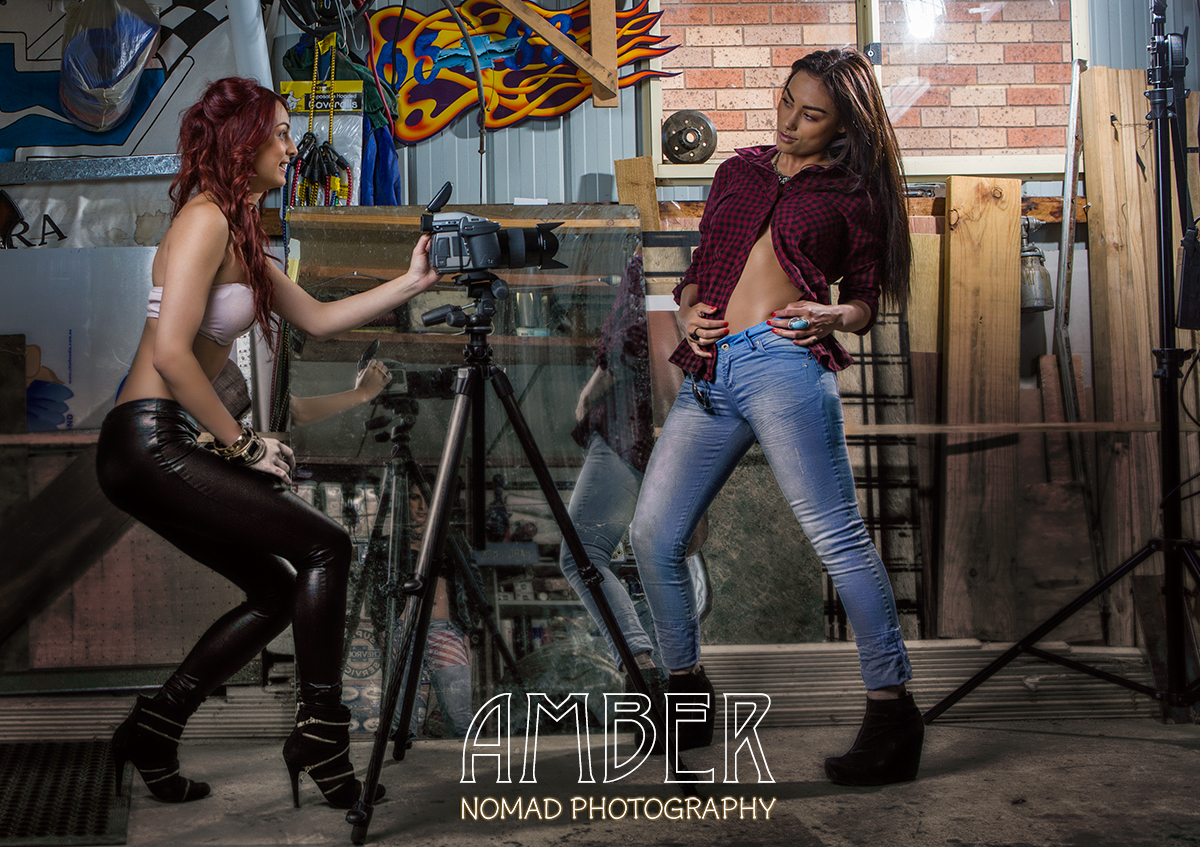
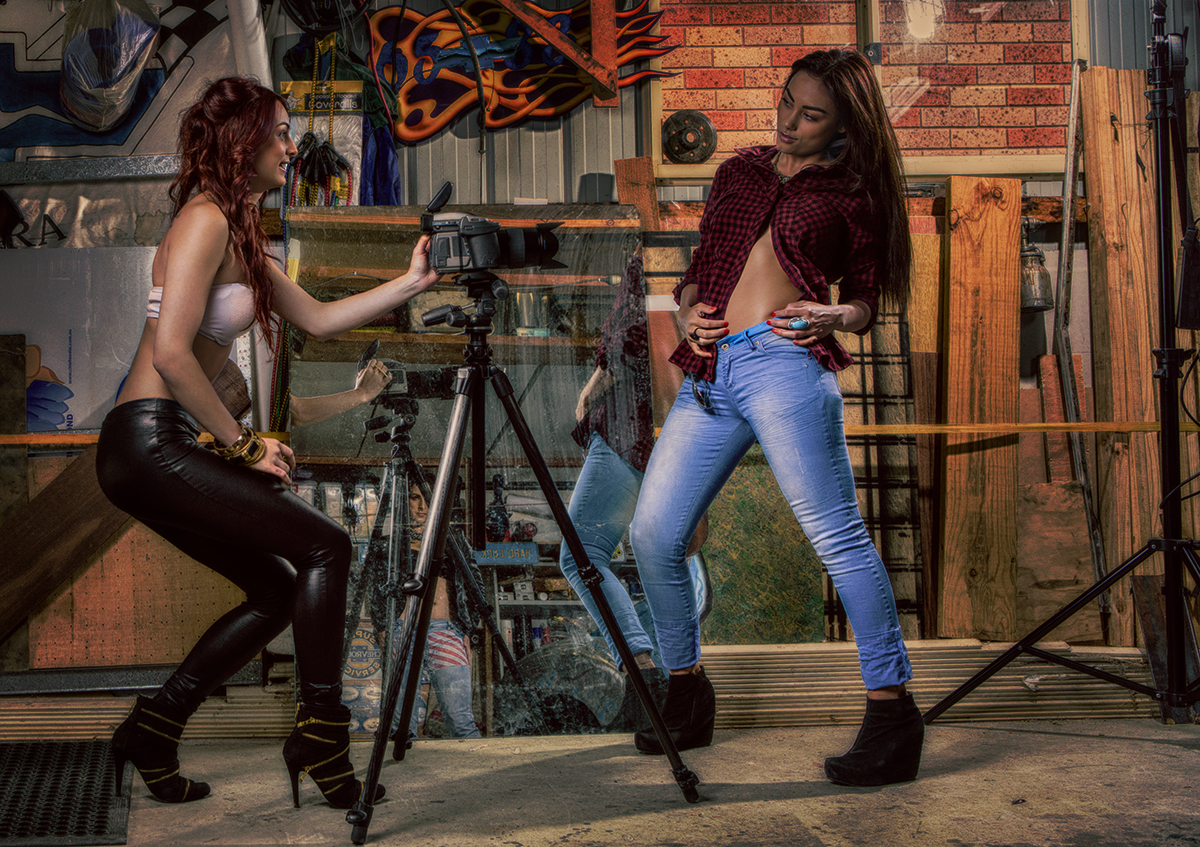
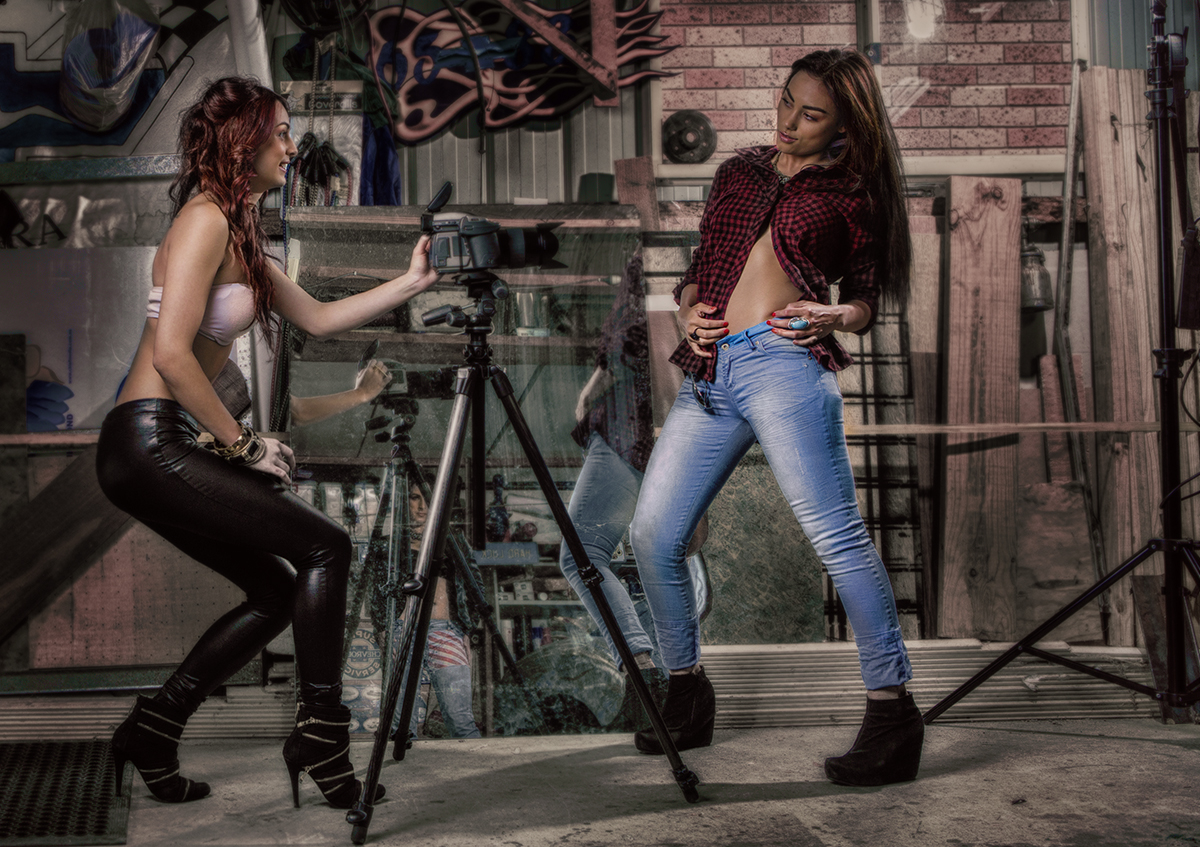
Amber was a fun photo shoot with three gorgeous models, Jaz, Britt and Amy.
It was my first time shooting with Amy but I have shot with Jaz & Britt for several times and they have become two of my favourite models for 2012.
We shot this session in a friend’s garage and played with his old car restorations tools.
For this shot, I used a simple two light set up, balancing with ambient light and background lighting to get the reflection of Amy in the mirror.
For the edit, I stacked several layers. Each layer would have a specific effect, on a specific zone of the image.
Scroll down for a step by step of how I got from start to finish.
Bear in mind that there is no one way to edit this image and the edits are to represent the look that I had in mind for this particular photo shoot.
You can check out the BTS (behind the scenes) of Amber following this link.
Models: Jariah | Britney & Amy
MUA & Hair: Jessica Peris
Location: Dany’s Garage.
Below if the step by step (and layer by layer) of my edits for this Amber series)
1- original image as out of camera
2- file after ACR (Adobe Camera RAW treatment)
In ACR I only do minimum adjustments: Lens correction, white balance and cropping
3- burn with a curve adjustment layer focused on the mid tones and shadows
4- desaturation with a saturation adjustment layer
5- another burn layer (local adjustment with a soft brush in the zones around the models)
6- dodge. Local adjustment layer focusing on the skin of the models (soft brush)
7- colour luminance (still focused not he models skin tones)
8- another burn layer using the contrast layer mask
9- in this layer below, I mainly focused on Jaz’s skin (the model on the right)
10- I used a local contrast adjustment layer to give the whole scene a little punch

11- sometimes, just a little touch of nothing gives a bit more emphasis on the models’ assets. Barely noticeable here, I added a touch of liquify on Jaz

12- a bit of skin smoothing on both models in the foreground and on Amy in the reflection on the mirror

13- local adjustment layer (burning) to draw the contours of Jaz’s abs

14- a final touch in dodging Jaz’s face to create more contrast and separation

15- the final image consisted of dropping in the logo for the shoot
![]()
Below if the before (half top) and after (half bottom) of the image.
While it seems a lot of work has been done to this image, you may have noticed that I apply the effect, generally, not he whole image and work my way down to the areas of interest.
I mainly shoot with flash (95% of the time, even outdoor) and my goal is always to record a scene as close to the ‘reality’ of the concept. I like global rather than local when it comes to adjustments.
Carefully lighting a scene can help when it comes to editing.
Notice that Amy, not as dominant in the picture still plays a major role in the feel of the story. It’s a bit like a voyeur watching two friends having fun with a camera.
Let me know what you think of the process and if you have any technique that you’d like me to try to edit this image, let me know in the comments below.
Thank you for reading.
0