Ashley SMART in Adobe Camera RAW – Part I
This is a shoot I did way back in May 2013 with Ashley. It was shot using some hot lights (3 ARI hot lights) mixing with a bit of flash to light the back ground..
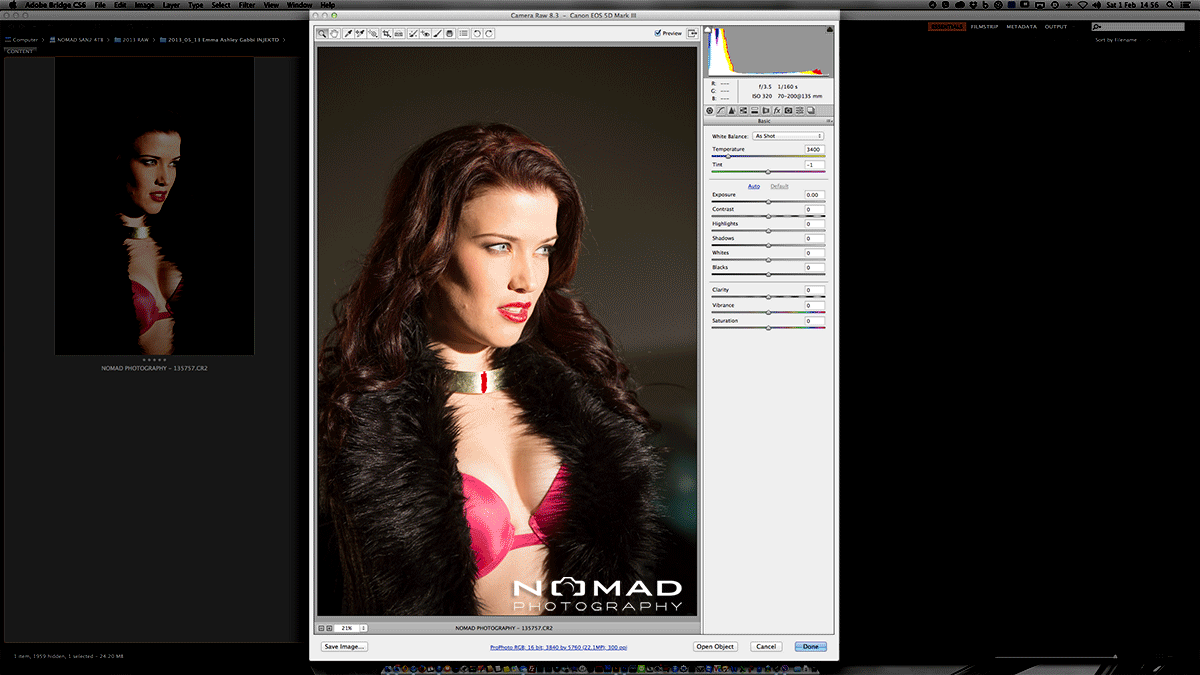
I’ve attached here a ‘semi’ behind the scenes shot to show a bit of the set up.
Note that the edits could have been done in Lightroom and since the shoot was in studio, lighting conditions can be considered as constant, further more I had the camera on a tripod.. ideal situation to create a preset and apply to each look during the shoot.
I’ve had LightRoom from the version 2 but I must admit that I don’t really know how to use it .. to its full potentials 🙁
I am used to import my files into my RAID drives with the software that came with the camera I use for the shoot (for example Canon’s ImageBrowser) and run them through Bridge. I also set my preferences so before opening any image, I would run it through ACR (Adobe Camera Raw) first.
I find myself using a lot of the adjustments in ACR. The same are found in Lightroom but it is so complicated so I just stick to the basics that work for me.
In the ACR step-by-step below, I will run through my basic workflow. Of course this is not the nay way to go to edit your RAW files and I am pretty sure if I edit the similar file twice, I would not have the same settings. It always depends on the mood that I am in when editing :o)
Scroll down and keep reading.. Oh, and click on the images to see them full size.
Click on the image above to have an overview of the process.
In the break down below, I will run through the steps that I go through when editing my images, be it for editorials or weddings.
I used to have another RAW adjustments when shooting with my Hasselblad medium format but Hasselblad released the right to their RAW algorithm, and since it is supported by ACR, I now use ACR for my H4D40 RAW adjustment as well ..
Below if the lights set up for the shot. I used a mix of hot lights, to light the model, and a flash to light the car (shooting through the widows to get the shadows on the background).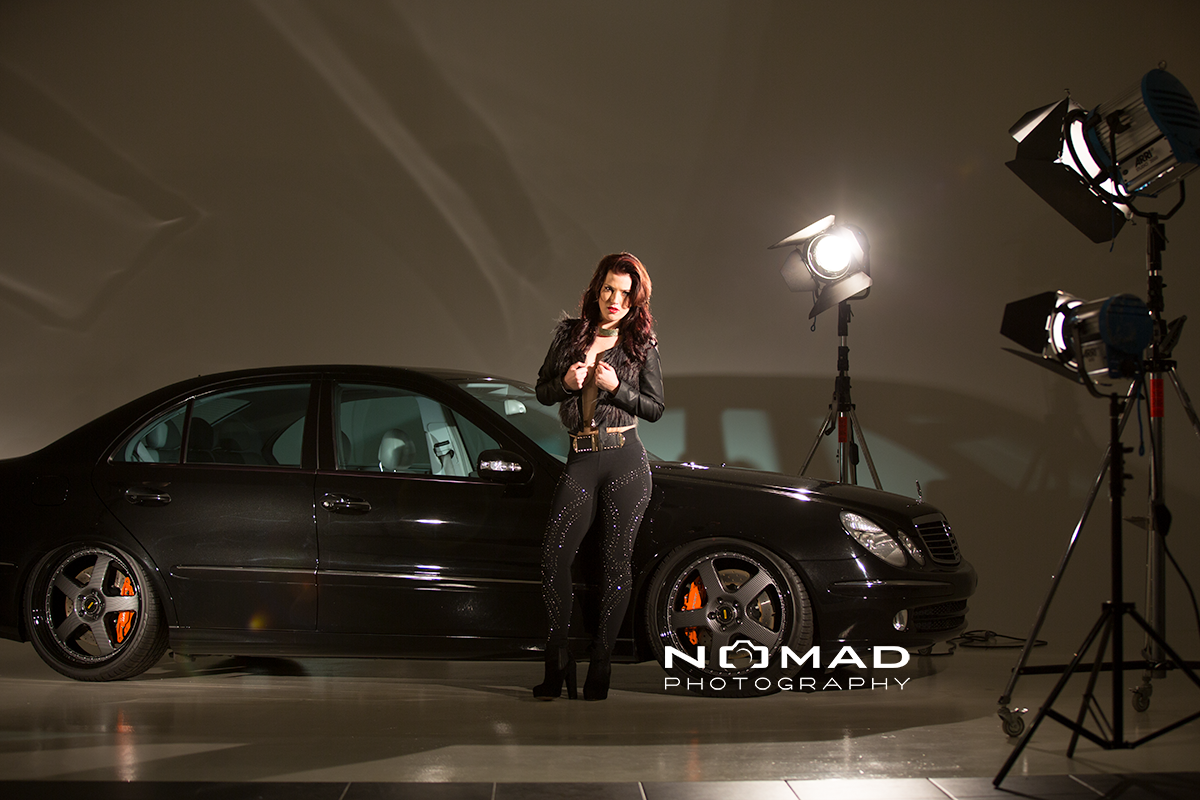
Step 1. Image as shot open in ACR.
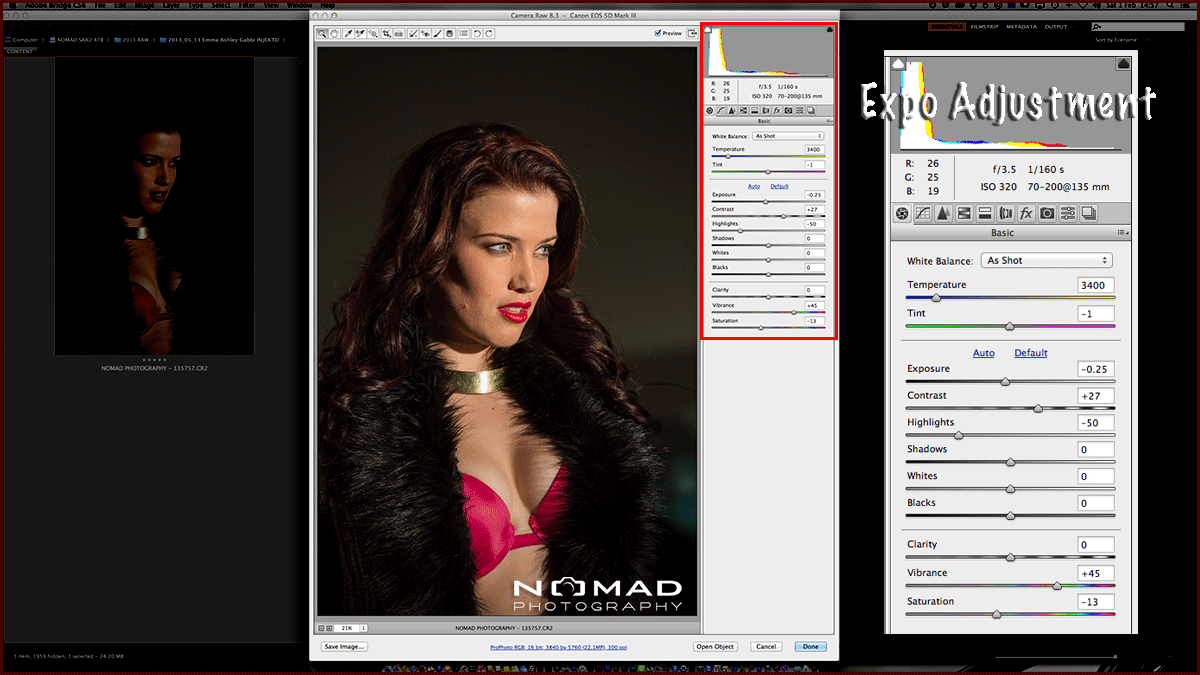
Step 2. Exposure adjustments.
Since the shot has been exposed within the camera’s dynamic range, lowering the exposure would maintain details in the highlights and a boost in the shadows will pull back the details in the dark.
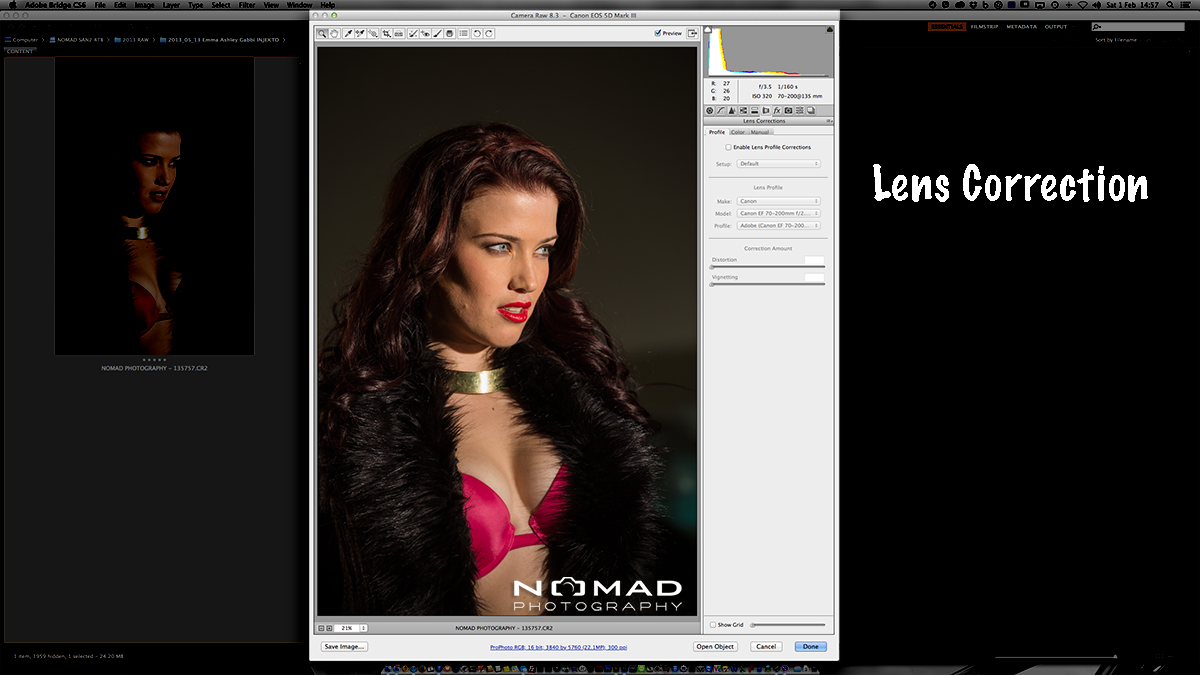
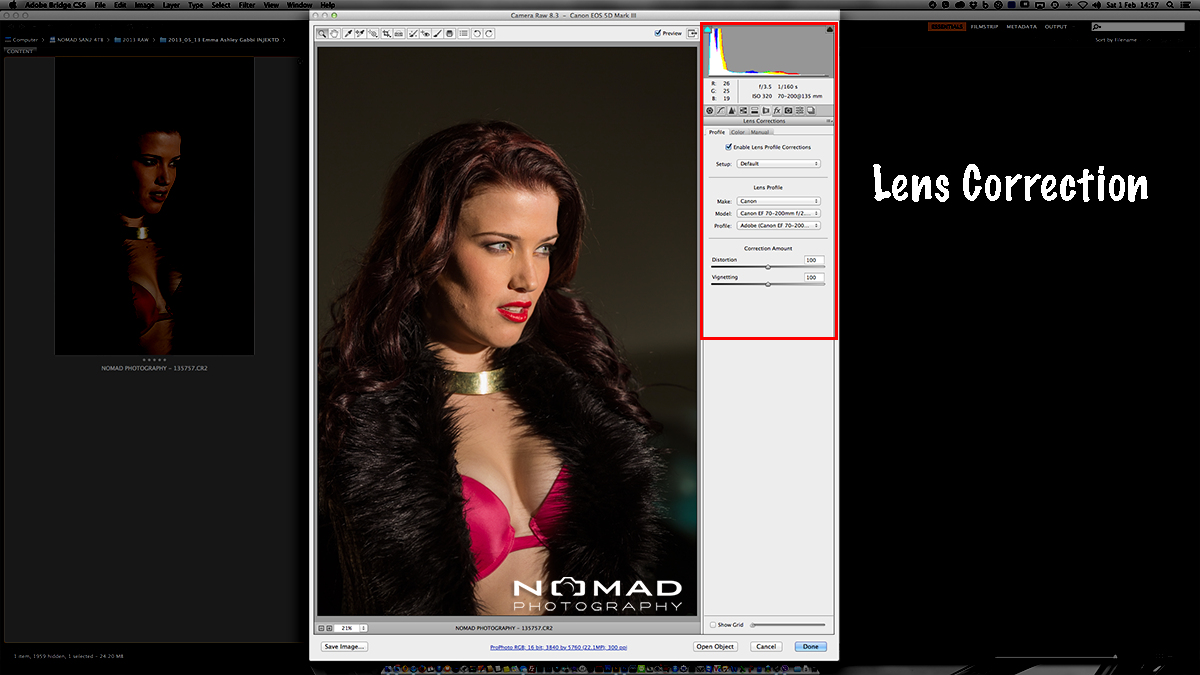
Step 3. One of the settings that I always use is the Lens Correction.
When using a wide aperture (from f/1.2 to f/2) I can easily correct CA, and colour fringing with this adjustments. I also throw in some vignette sometimes using the two bottom sliders.
You can see the slide distortion correction between the image above and the one below.
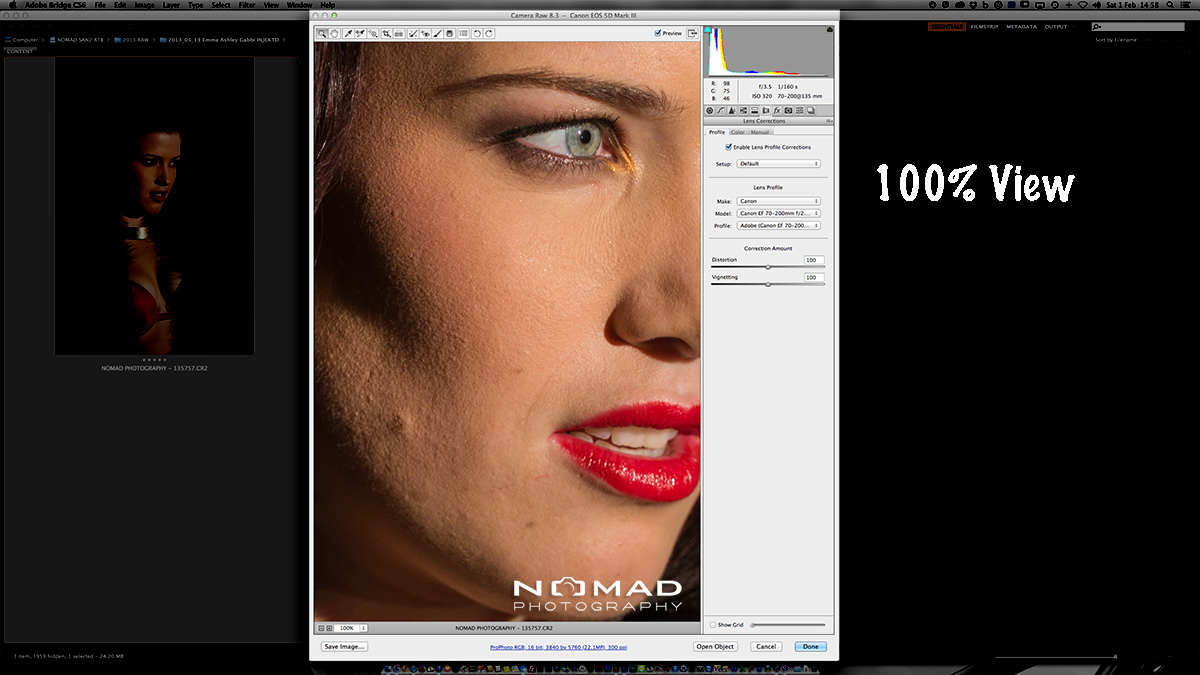
Step 4. Dust or Skin edit. Better view at 100% pixel size
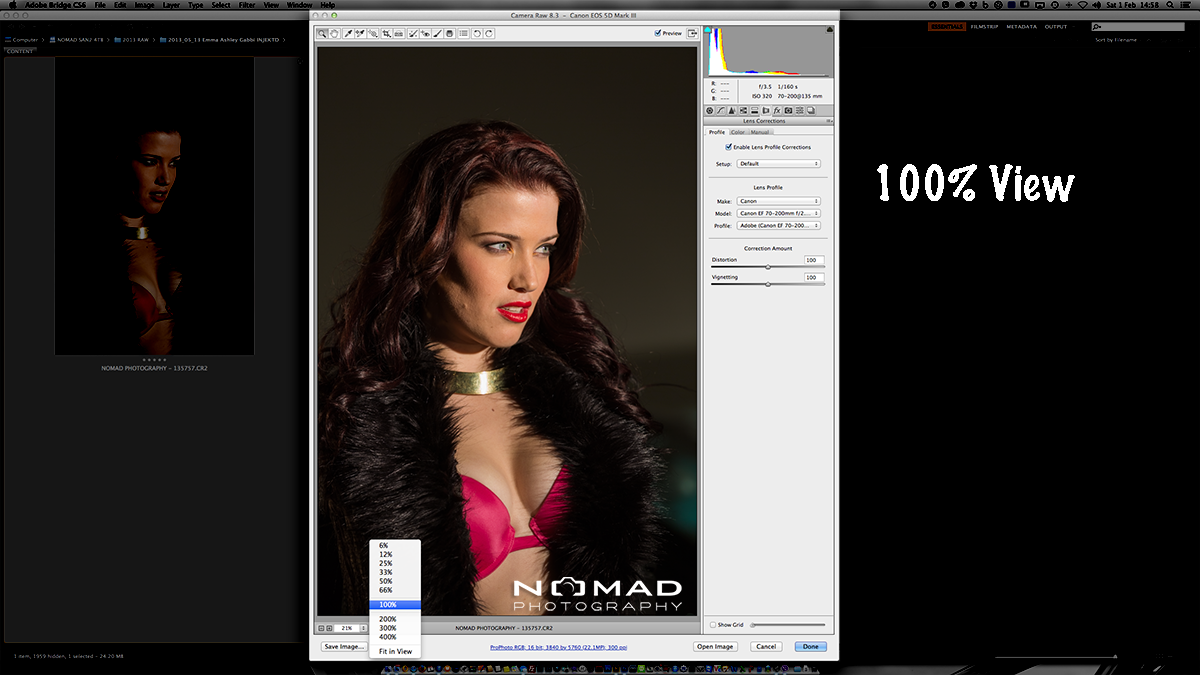
100% view can also be activated with a mouse right click anywhere on the image (any tools except the dust removal one).
Select the dust removal tool (red) and click and drag on the areas where you want to ‘heal’
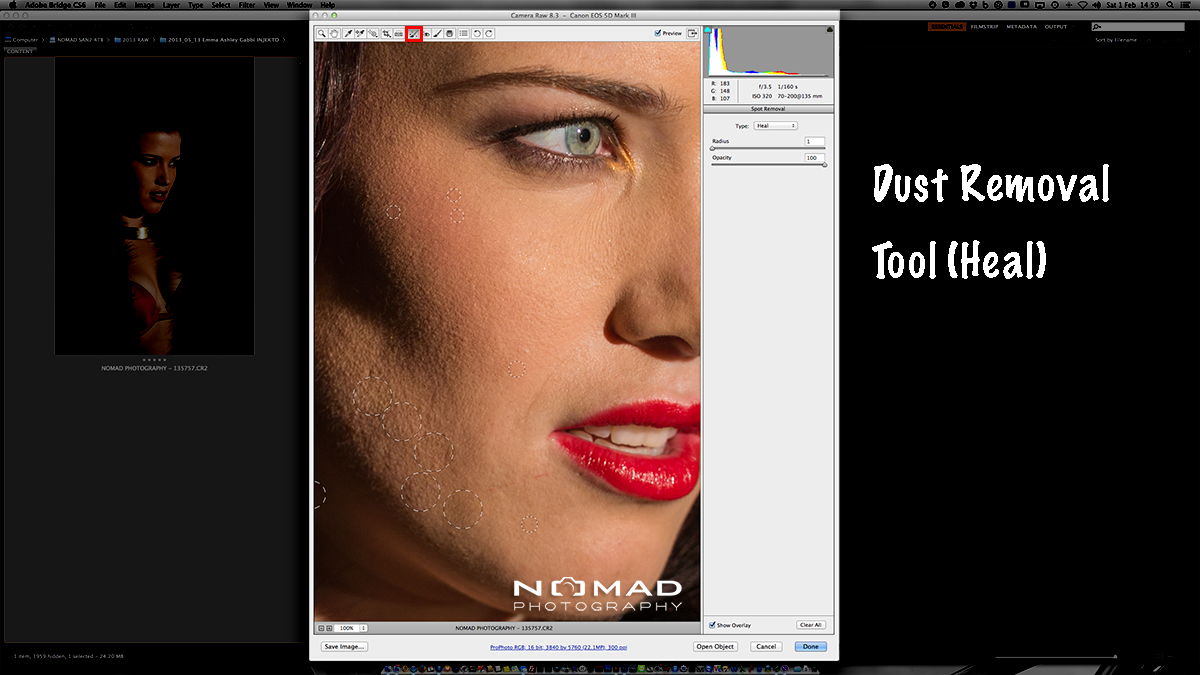
By selecting another tool, the circles of the healing brush disappear. Changing tools allow you a better view of the ‘after’ effect and to assess the result.

Zooming back by either the view menu or right click on the image and choose Fit to Screen.
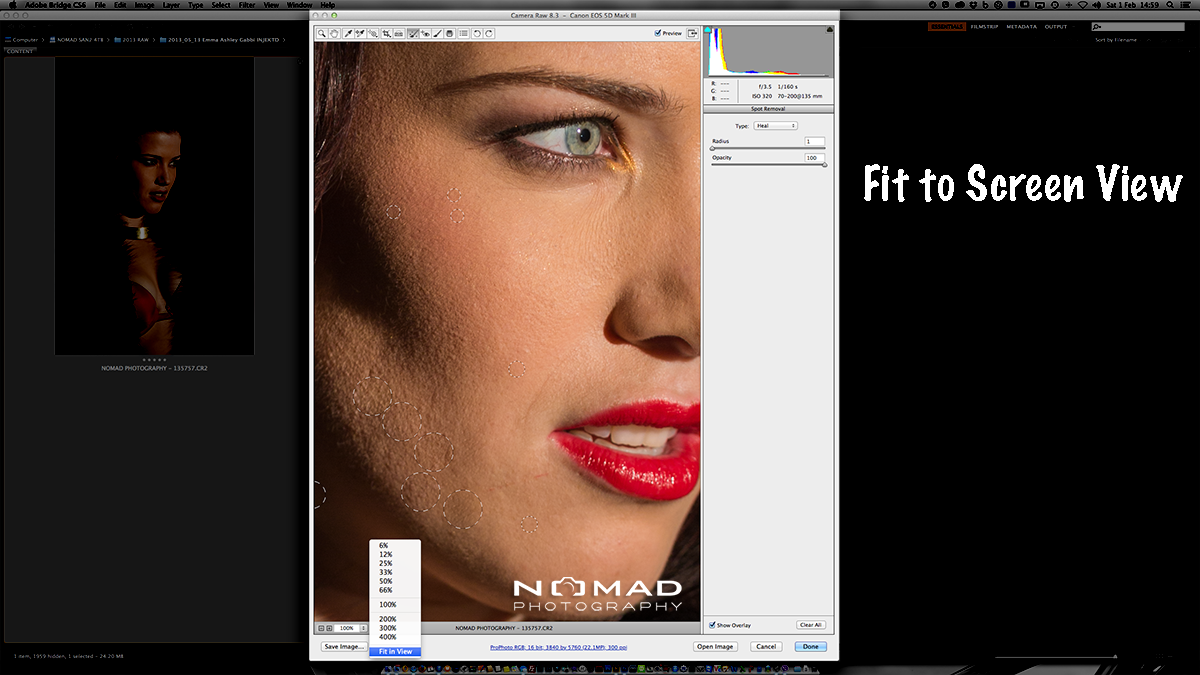
Fit to screen show the whole picture. Note the areas of the healing brush (Dust removal tool).

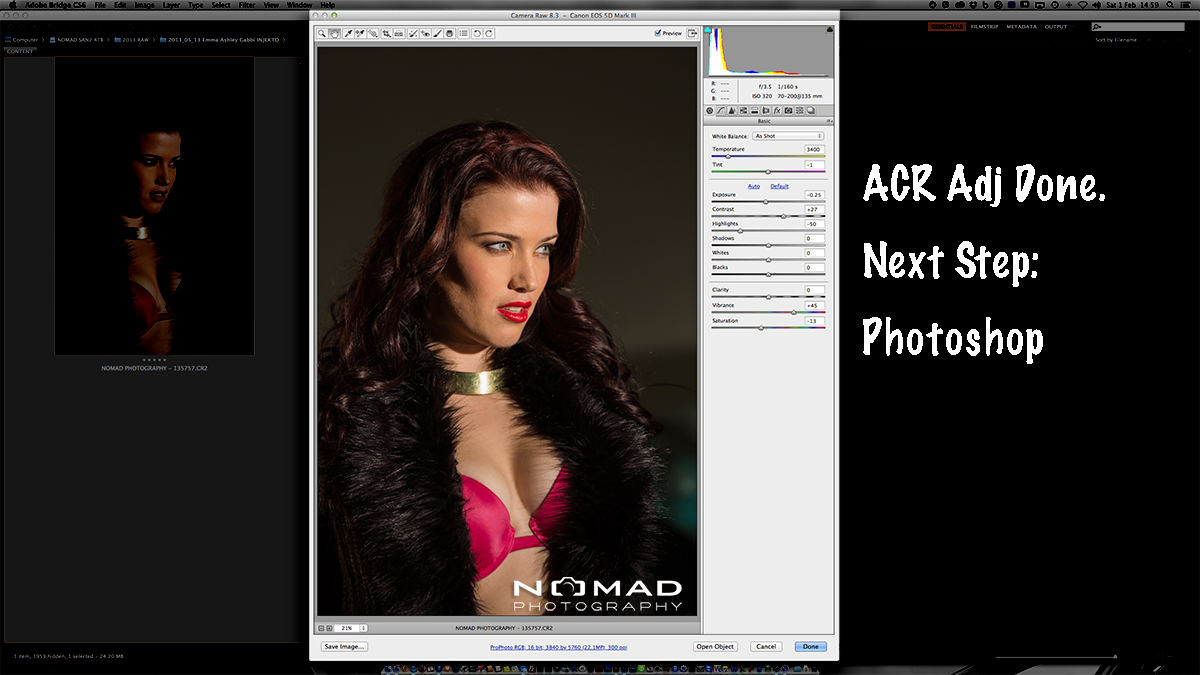
By selecting another tool, the healing brushes disappear to reveal the ‘after’ image processed in ACR.
You can either click OK and close ACR (the XML file will keep all the changes made) or press Open Object (image) to open the image in Photoshop.
Hope you enjoy this Part I of the edits.
Part II will show you the end result after some Photoshop editings.
Let me know what you think int he comments below or if you;d like to know how I would edit a particular type of image, fell free to throw in your questions.
Happy editing.
0