iPAD editing
Some of you may already know that I use the the Eye-Fi SD card, for more than a year now, to transmit wirelessly my shots to my iPads2 and the New iPad on location.
The iPad is so cool and I can almost do everything on location, on a shoot with it. No more need to carry around a laptop and I can generate my model releases from the iPad, remote control my camera, wirelessly, from the iPad, transfer images on the fly to assess focus and composition and even give it to my assistant or the stylist or client so they can see what is going on and also to show the models the shots so they can have an idea of what we are doing and how to work on a specific pose.
Since I have my files transferred to the iPad on the fly, in between looks, while waiting for make up and styling to happen, I used to play editing with the … iPad for facebook update or event web blog. The retina screen of the iPad has a high enough resolution to go beyond full HD.
Needless to say that I have questions and requests on what apps I use and how I use them to edit images on the iPad.
In this post, I’m going to walk you through the edit that I do using two main apps: Snapseed from NikSoftware and iPhoto for iOS from Apple.
Before I start, let’s get the poo out of the way:
This post is about how I do the editing with the ipad, it is NOT intended to be the only way to do it, you may agree or disagree with the way I do it or may be there are other apps more awesome to do this but the main reasons for me to use these apps are:
– Snapseed is when I got it, it was offered as FREE download for a limited time (I think it is around 9 USD or something)
– iPhoto for iOS, I paid for it because it has the brushes that Snapseed lacks. These brushes allow me to air brush roughly an image and send them back to a client when on location. For aquick job, iPhoto does it well.
Now, let’s get started.
On a shoot on location, or even in studio, my Canon 5D Mark III is fitted with two cards, one CF Card where I shoot full size RAW images and one SD card which is the Eye-Fi X-Pro II 8 GB, in which I shoot JPEG S1 in size (5.5MP).
Why not shoot larger JPEG? Because it would take more time to send to the iPad and since it is used to assess composition, sharpness and selection, I don’t really need larger files and let’s face it, 5.5 Mega Pixels is more than enough for proofing anyway.
Note that you can post your edited images straight from the apps, Snapseed or iPhotos for iOS but because they complement each other I don’t really mind swapping around to get the finished images that I want.
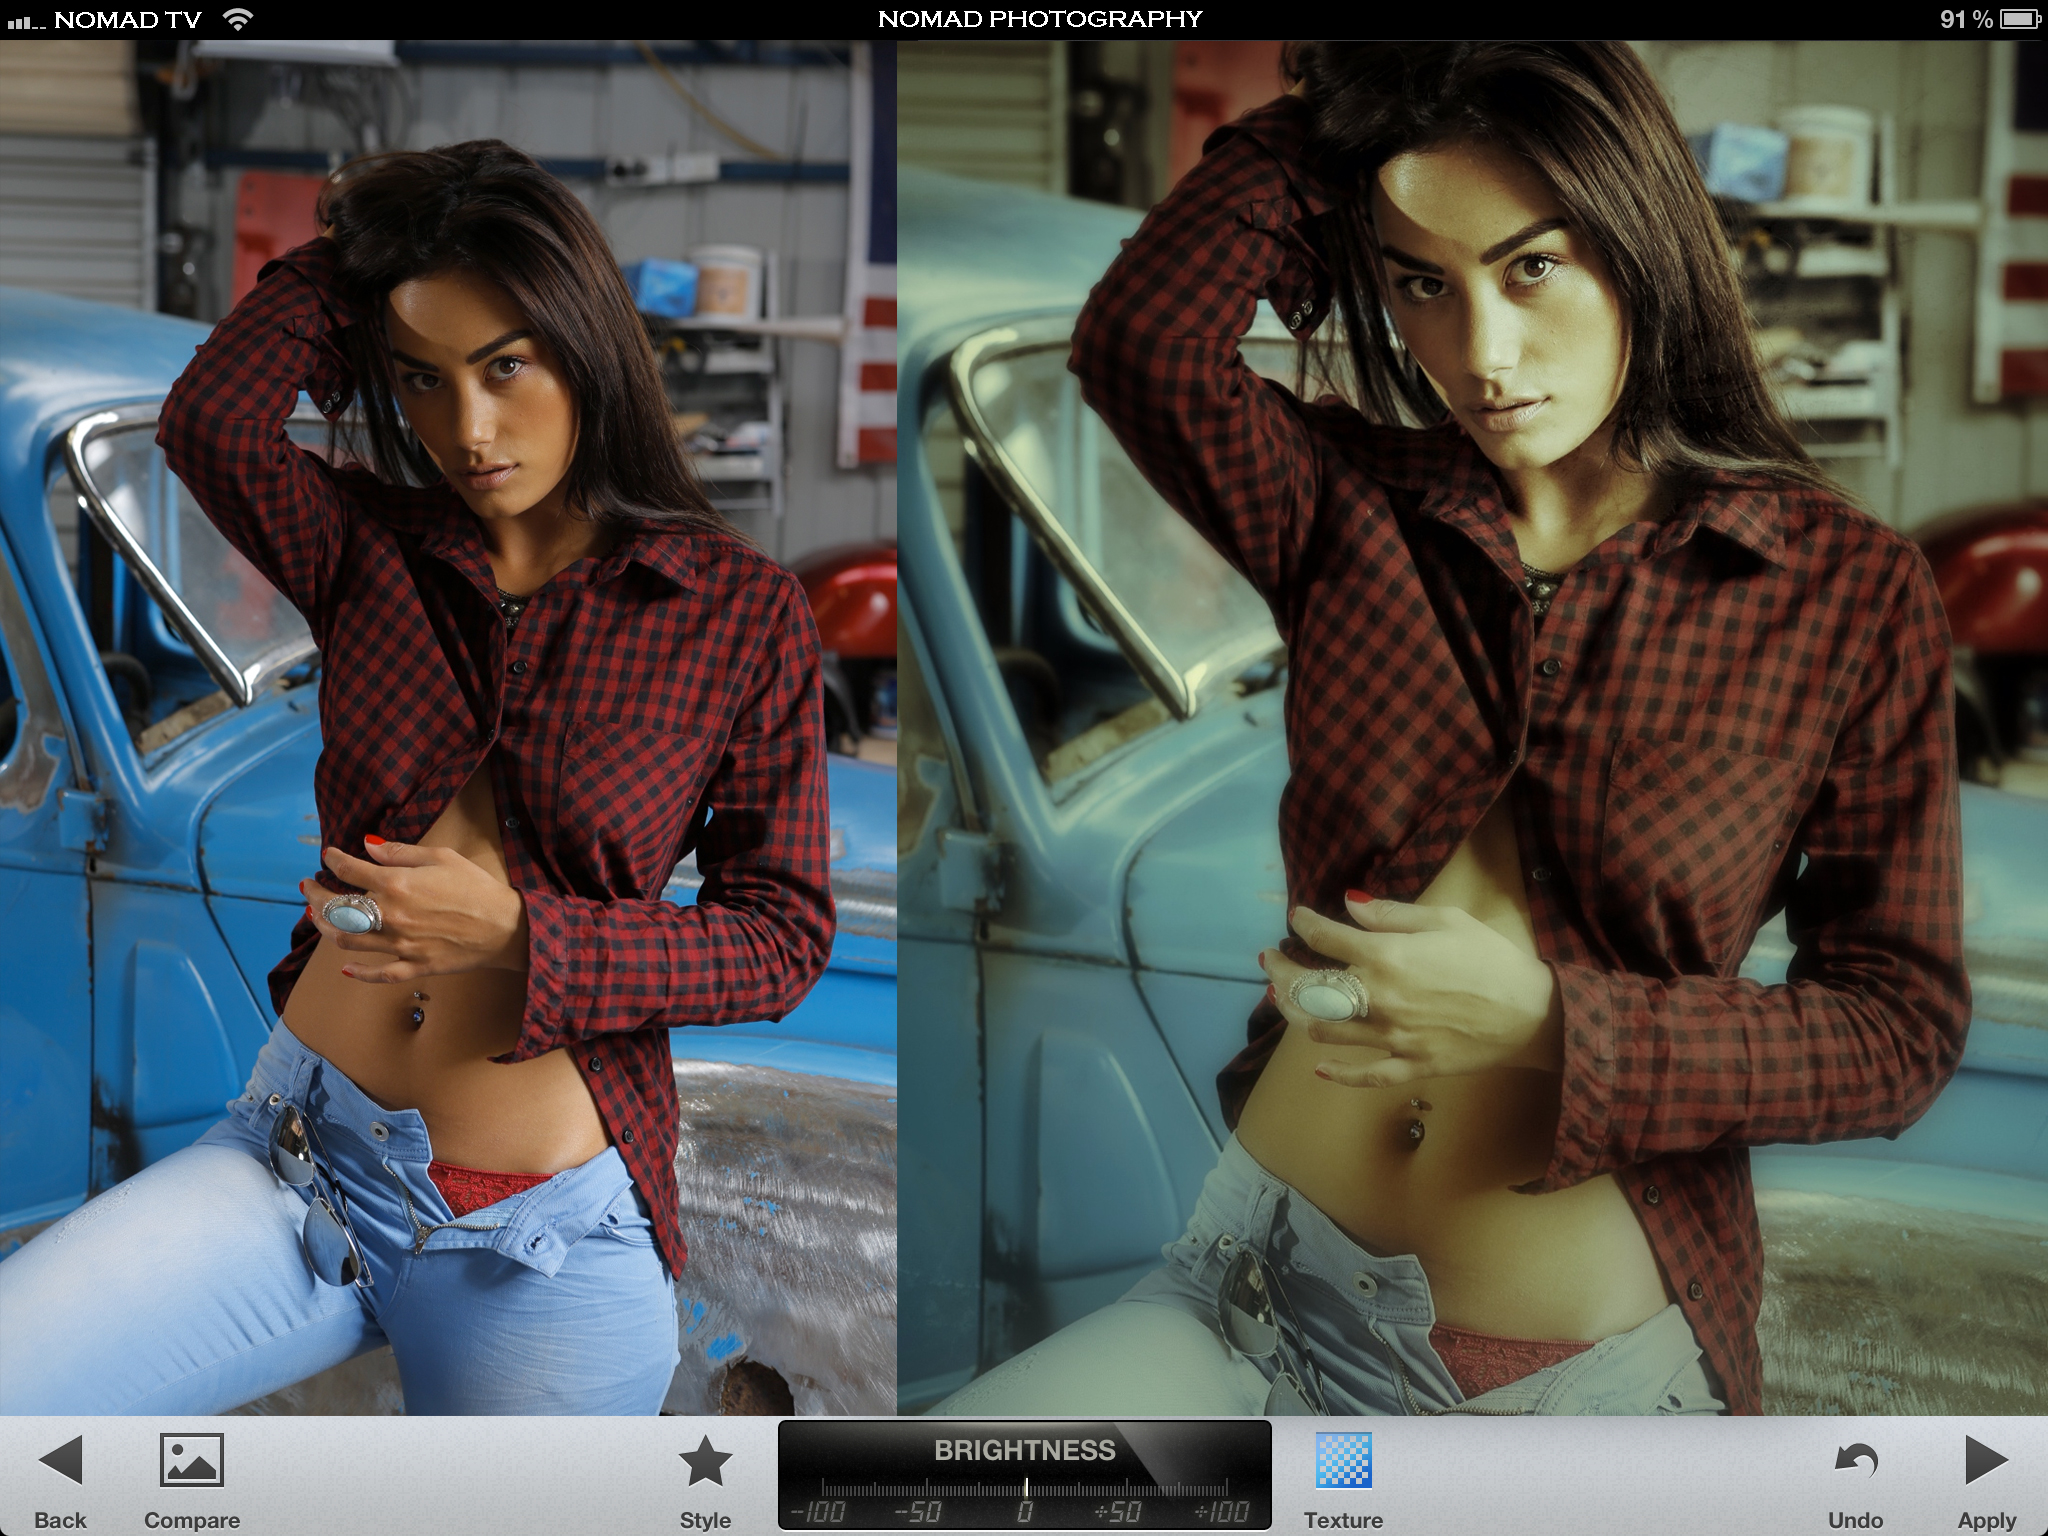
The first screen below is a mock up to show you a bit the before (as captured) image and after (end of step one) using Snapseed. Remember, this is step one and there is step two a bit further down.
Snapseed can open images from your photo stream and you’ll need to make sure that the image you want to work on has been exported from the host apps (I use ShutterSnitch as the host app to receive imahes coming from the Eye-Fi cardbut you can also use the Eye-Fi apps that comes free with the SD card).
Our gorgeous model for the shoot: Jariah Travan
Make Up and Hair by Jessica Peris
BTS video by Michael Watson
Location is an awesome garage from a friend of mine who is restoring old Chevey’s, Danny
The screen below is from Snapseed. You get here by launching the apps then click on the top left button (Open Image).
You can then navigate to your photo stream and select the image to open. You then come to the screen below.
On the left you have a selection of tools/filters available.

I normally start by cropping my image to give it the composition I want for the finished image. Keep scrolling down.

Make sure you select the Free ratio so you are not constraint to some pre-set size.

Once the Free Aspect Ration is selected you can draw the crop you’d like the same way you’d use your iPhone and iPad, with your finger.
Once you are happy with the new composition, click the Apply button on the bottom ring of the screen to validate.

Each time you validate an action you’ll return to the main screen where other filters are now available.
The next filter I chose for my edit was Details. I just like the way it gives details back to the image, especially in the shadows.
The next two screens show that I increased the Structure and you can see the difference between the screen shots below.


The same way as I applied the Details filter, after clicking on Apply for Details, I then chose the Grunge filter to add some Textures.
Remember that you can select the type of textures, apply the strength for the structure and also adjusting saturation and brightness just by sliding your finger up and down the screen, between parameters and left and right for each value.
Snapseed comes with some presets (Styles and Texture) as a starting point and you can customise/adjust to taste.

Once you are happy with what you see on the screen, hit Apply on the bottom right to validate.

The next filter below that I’m gonna choose is Center Focus. It allows me to emphasize the point of focus while blurring out the surroundings.

By default, the filter sets the center of focus in the middle of the screen. Of course to make it work for you, you’ll need to drag the center point where you want it to be, with your finger. I naturally chose the model’s eye that is the closest to me. Keep scrolling.

Adjust the blur strength and the size of the center focus point dragging left and right and up and down your finger on the screen. When you are happy with the result, hit Apply.

At this stage, it’s all I can do with SnapSeed so all I need to do is to save it to my photo stream to keep a copy of the final result.
Note: There is a Back button on the bottom left of the screen, be careful when you use it because it will revert your image to the original one as it was just opened. In this case I went through 3 different filters without using the standard settings. Getting the image back to original image and it would be very difficult to recreate the exact same effect for the image.
This is a lacking feature that I’d like NikSoftware (or Google now as they just bought NikSoftware) to implement: an undo button that would only cancel the last filter used.
Another really nice function would be to save recipe for ‘stacking filters’. The latest version of SnapSeed already gives you the option of saving your setting for each filter (up to 6 slots available) but not as a complete recipe.
Should I ask for actions as well ..? :o)

At this stage, the image above is as far as I can get to create the effect that I want, for additional effect (air brushing) I’ll need to use my other favorite apps: iPhoto for iOS.
The cool stuff here is that iPhoto syncs with your photo album (or photo stream). All you need to do is load the apps and it will update its database to include whatever is in your photo albums.
Select the image you just saved with SnapSeed to open it and you have the screen below. On the top right of the screen, hit Edit to start the edit mode in iPhoto for iOS.

Notice now at the bottom of the screen is a toolbar.

For air brushing, I’m gonna zoom in the image (pinch with two fingers) and click on the Brush tool (fourth button from the bottom left) and select the Soft brush.

With your finger, paint over the area you want to smooth. I noticed that the harder I pressed on the screen of the iPad, the more pronounced is the brush stroke, just like it is pressure sensitive or something. That’s really cool.

Finishing up the face and the neck, scroll down with two fingers to other areas that need airbrushing. Repeat until done.

Sometimes, the finger is not as precised as the tip of a Wacom stylus, you may go over the edge or on areas that don’t need air brushing (soften or loosing sharpness) like the eyes or part of the hair. You can ‘recover’ details using the Repair brush below or just use the Eraser tool (second from the bottom right) to remove the unwanted air brushing.

This is looking pretty cool and I am quite happy with the finished image. Hit on Edit again to exit edit mode.

From this screen, you can hit the Share buton (Fourth button from the top right corner of the screen) to bring up the options in the share window.
You can see in the screen capture below various way and destinations to share your image. I chose to save it to Camera Roll.

because iPhotos is linked to the Camera Roll library (I called it Photo Album or Photo Stream earlier) the new image will be also updated in iPhoto’s library.

Below if the finished product. It took me lest than 3 minutes to go from captured to finished using these two apps, SnapSeed and iPhoto for iOS, that have become my favorite apps and that I really use all the time.

Hope you enjoy this little share/tutorial.
If you have any question or comment, throw them in the comment box below.
Spread the love, share this post. More coming ..
0