Sweet Sixteen
I receive a lot of emails asking on how I use/set up my lights for a particular shot, especially when shooting outdoor and how to balance ambient and flash.
Rather than responding to individual email, I thought that putting a post up here would allow everyone to have an answer and also be able to chime in with comments and questions that would benefit everyone.
Last Saturday, I had a fellow photographer and friend, Jonathan Dear from Vibrant Photography, coming to town and I set up a quick shoot with one of my favorite models, Priscilla (make up done by the awesome Nicole Tsotsos).
Jonathan came with his brand new Canon 1 Dx, the brand new Canon 24-70 L II and the massive Mola Beamm beauty dish and I set up the shoot by the Reconciliation Place, by the lake. Needless to say that the dish got passing by people very intrigued as we didn’t look in anyway like any CSIRO nerds looking to communicate with aliens.. :o)
Now when shooting outdoor, directly under the sun, there are some basics that you may or may not already know. It is said that when you shoot under the sun (not in the shade), the base starting exposure is f/16 with a shutter speed inversely proportional to your ISO i.e. if your ISO is set to 100 then your shutter speed would be 1/100th of a second. This is called the Sweet Sixteen exposure ‘rule’. Of course this is just a starting point to set up your exposure and a reference for your light output setting. You may need to adjust your exposure in regards of the reading that you get form your histogram or whatever you may use to assess exposure.
Naturally I set my aperture to f/16 and my ISO to 100, however I set my shutter speed to 1/160th of a second, why is that? Because I wanted to under expose the background by 2/3 of a stop, just to make my subject pop out of the background and yeah, the light is set for f/16 as well.
This is what I get straight out of the camera viewed at 35% on an 30″ Apple Cinema monitor. Click on any image to see the full size.

As you can see in the image above, my background is slightly under exposed and at the same time my subject is UNEVENLY lit by the sun, from the left of the frame, and by the light from the right. When it comes to ratio your light, look for the shadows. Check the shadow on the ground in the low centre of the picture above: You can clearly see the spread of light out of the Mole Beamm and especially the different shades in Priscilla’s shadow. Note a bit of blinkie red ‘burnt out details on Priscilla’s left and right arms above the elbows (red patch) and a bit of lost details in the shadows under her left shoe (blue patch). You can also see the over exposed area (red patch) in the beauty dish itself but clearly this is not an issue.
There is NO point to overpower the sun here and you can clearly see that the sun has a higher ratio in this image by the shadow still defined within the spread of the Mola. Outside the spread of light from the Mola, the model’s shadow is darker. This is how I like to light my outdoor shoot because it looks NATURAL and because light from the sun is like God’s light, don’t waste it.
Just imagine one second: when you look at an image where the sun is behind the subject and the subject’s shadow is BETWEEN the sun and the subject him/herself… WTF to that.
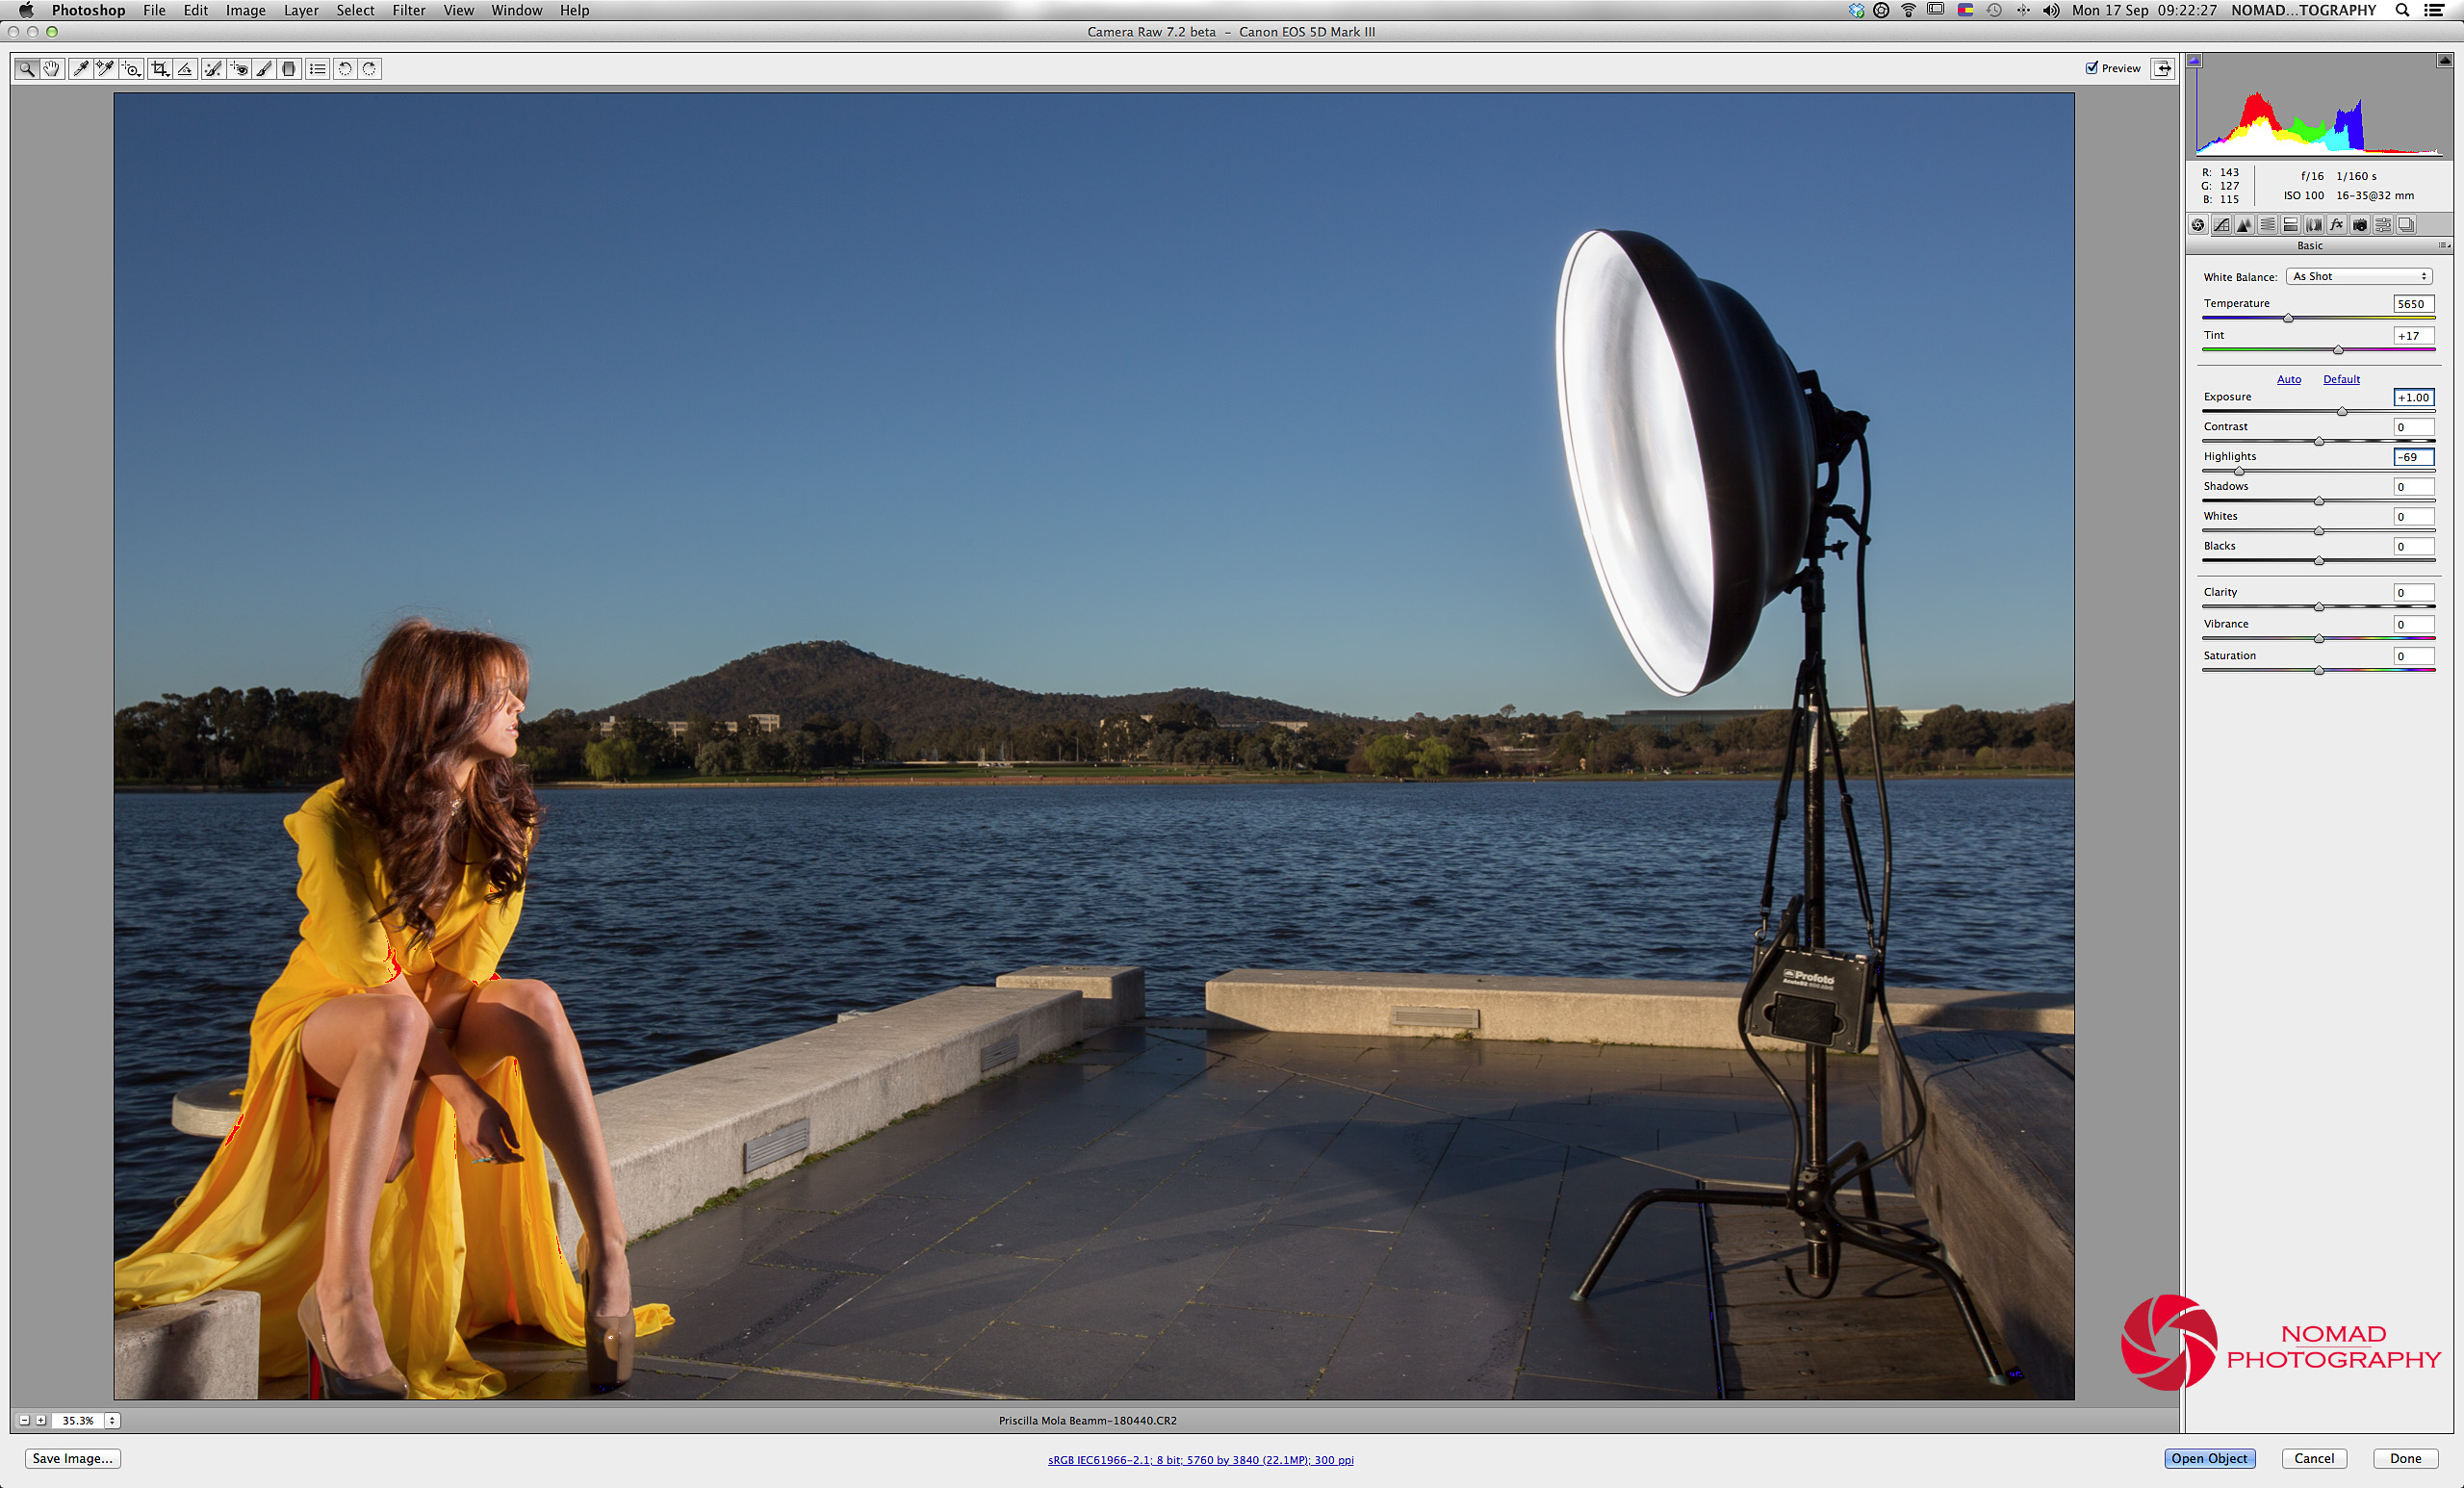
In the image below, you can see the setting of the shot and as mentioned above, the image is straight out of camera and shown in Adobe Camera Raw 7.2 Beta version. No adjustment has been made and shadow and highlight alerts are turned ON.

As highlighted on the top right of the screen shot above, You can see the camera settings (f/16, Tv1/160th Sec and ISO 100). The sliders clearly show no adjustments of the image and alerts for shadows and highlights are turned ON.
Below is a 100% view of the image focused on the model to assess details especially the details that may have been lost in the over exposed areas (red patch)

From the above image, I could assess that no details have been lost and also you could easily pull down some luminosity in the yellow channels to clear the red patch (oh.. just to be clear, these red patches will not show on the image. They are just indications of areas where you may have been out of the dynamic range of your camera’s sensor… yeah?). I simply decided to turn OFF the highlight alerts and the image below confirms it.

Remember that lost details are pure white and pure blacks, while this image shows a pike in the white and red channels, there is NO loss of details on the model.
[box type=”info”] there is NO loss of details on the model..[/box]
Now I want to show you why I set my camera the way I did to get this shot and a touch on the Sweet Sixteen metering rule. Remember that I underexposed the ambient bu 2/3 of a stop? What if in Camera Raw, I added back 1 stop of light? This is exactly what I did in the image below. Look at the Exposure slider on the top right hand side of the image below (Exposure +1).

Of course because the scene was correctly exposed with balanced flash and ambient, everything goes blinkies and red patches jump out all over the place as shown in the image below..

Now, look at the image above, the background is perfectly exposed and obviously ONLY the sun is lighting it. But when the background is perfectly lit by the sun, our point of interest is the model and right now… she’s burnt. Let’s have a closer look to assess the damage in the 100% view image below..

OK, from what I see above, the model is well burnt and you can see that from the top right of the above image, all I did was adding 1 stop in my exposure to get a more natural background exposure.
…
Hang on a minute, from my original image, the model is correctly exposed, right? Priscilla is looking gorgeous and from what I remember, I just had two tiny blinkies on the yellow dress sleeves that didn’t loose any details… Well my friends, because you have properly exposed an image the details are available for you to do whatever you want in the RAW file (still true if you shoot JEG though) so all I need to do here, right now if to claim those details back. How do I do this? Just slide that Highlights slider back. I chose a value of -69 in the screen capture below (Highlight alerts still turned ON)

Priscilla comes back to life with all her galmour and awesomeness (on the side, Pris is so fun to work with and if you need a model for any type of commissioned work, I would highly recommend her as your first choice model. Her size, shape and forms would go for any type of product/promotional photography).
Let’s have an overview of the original image and light set ups. Have a look at 35% on a 30″ Apple Cinema screen capture below.
The only point of concern from the above image for me is the blinkie (red patch) on some tiny parts of Pris awesome yellow dress but as demonstrated above, there is NO loss of details in these areas so you can just either ignore them or turn OFF the highly alerts and they won’t bother you or your client in any way. Note that with +1 stop Exposure, -69 Highlights Recovery and highlights alerts turned ON even the Mola is well exposed .. :o)
You can either decide to pick the first or last images as a delivery product but remember that all the details you need are available in the correctly exposed and correctly balanced RAW file.
Some of you may think that to take to take your outdoor flash photography to the next level, you may/will need that big of a light head or to spend hundreds and thousands of $$$ in gears. I can tell you that when it’s sexy and fun to play with sweet gears, you can achieve this kind of look with far smaller lighting gears and event flash guns. I can teach you how through my one on one lighting workshop. You can contact me by email to thierry@nomadphotography.com.au or by phone to 0402 185 397 for information and/or booking.
To conclude, I’d like to thank Jonathan for the time spent with us and for allowing me to play with his Mola Beamm, the awesome make up artist Nicole Stotsos that I highly recommend and of course our famous and fabulous model Priscilla Crossleigh for her professionalism in such a short notice.
The hot line is now yours to chime in with your comments and questions.
1